At the beginning of September 2022 I made the jump from VS Code to Neovim. I was having issues in VS Code with workflow and it was getting uncomfortable to use with the way keyboard shortcuts are handled. Moving turned out to be a great decision, and I even wrote about it here. I've been able to increase productivity and build an editor / IDE experience that is personal to me.
But that was all on Linux.
I do nearly all of my work on a Windows machine, and for the software work that I do I use the Windows Subsystem for Linux, version 2. This works great for me, but I occasionally want to edit some files on the Windows side of things and I really wanted to have my Neovim setup working in Windows natively. I also have a couple of projects that target Windows that need maintenance from time to time.
I decided to write this article because there appears to be a knowledge gap in the Neovim community regarding how to set things up and get them working smoothly on Windows. In the process of trying things and getting them working, I found a "happy path" that I think other Windows users will find helpful. I discovered that there are a few things people need to do and a few other things they need to install to get something that:
Neovim is a TUI program, meaning it runs its UI in the terminal and uses character placements to make things look right. This differs from other Windows applications that are nearly all GUI apps, meaning they have their own user interface as part of the application. What this means for you is that you will need a few things set up first to get Neovim working the way you expect. Once these things are addressed, Neovim can be smooth and productive in a Windows environment, just like Linux and Mac.
Basic requirements
The first thing you need is ... well ... a computer with Windows on it. This guide will cover steps for installing in Windows 11, as well as Windows 10 with updates applied. If you don't receive and install system updates automatically, you might hit a sticking point here and there but overall this should still work.
The second thing you will need is an internet connection, which I assume you have or you wouldn't be reading this.
Third, you need to be signed in with a user account that has administrator permissions.
Lastly, I assume a minimum knowledge of how to do some basic command line things like change directories, make a directory, and run a command. If this is foreign to you, spend some time understanding that first. You won't need a lot of knowledge, but you will be better off if you aren't starting at zero.
I recommend you read this guide all the way through before starting as well, so you are aware of the context of each step and how it influences the following steps.
If you get stuck, you can post a comment and I'll try to answer your question, but you might get a faster (and better) answer by posting your question on the Neovim subreddit, or by jumping into one of the chat rooms scattered about. The Neovim official IRC is a good option, and the Vim channel on ThePrimagen's discord server is quite active as well.
Get a decent terminal
You have a few options for Windows on which terminal to use, but DO NOT stick with the stock terminal that ships with windows, otherwise things won't look right. The basic terminals that ship with Windows are designed to be an entrypoint to some CLI commands and nothing more. In contrast, a "modern" terminal will support better rendering, full color support, broader font support including unicode characters, and many other things. Some names come up in the Neovim community often such as Alacritty and Wezterm, but if you are on Windows, it's hard to fault Windows Terminal for a good experience. For this guide we'll use Windows Terminal Preview, which has all the latest features and is a bit easier to configure through the interface, but standard Windows Terminal will also work with the same instuctions. Installing it is also very easy.
Open the Microsoft Store app
Search for "Windows Terminal Preview" or "Windows Terminal"
Install it.
If for some reason you don't have access to the Microsoft store, you can install it with the MSIX bundle instead, which you can find at the official github releases page here. Just make sure you are getting the version you expect. The standard version will be listed first, then the Preview version. Find the heading for the version you want, then scroll down until you find the "Assets" section which may be collapsed. It will look like this.

Expand it, then download the MSIXBundle that matches your OS (Windows 10 or 11)

Once you open the download, an installer should start and you can get your terminal installed.
If you decide to use a different terminal, you'll have to figure out how to set the font and default shell profiles on your own. If you are in Windows Terminal you can follow my instructions below.
Get a Nerd Font
This is a critical step as many of the finer points of the Neovim display rely on additional "glyphs" to display properly. What are glyphs you ask? Simple: a character in a word is technically a glyph, but so is an icon, and so is a border character or corner character, etc. Neovim uses these to build the UI one character at a time. You can find a great collection of free downloadable Nerd Fonts at Nerdfont.com. I personally like Caskaydia Cove, so I downloaded it.
Then unzip (extract) the folder that you just downloaded by right clicking it and selecting "Extract all", and then open the new, unzipped folder that pops up. You'll see a whole bunch of files, and you need to find the ones that say Windows Compatible. Edit here - this font appears to be patched now so just pick them all, but note that this download comes with Monospace and Regular versions, so you'll get both.

Then right click on the group selection and select "Install for all users". This will make the fonts available in your system.
Elevate your permissions
The rest of the setup portion of this guide will assume you are in a terminal that is running with Administrator permissions, but first you need to get said shell open. In your bottom left search tool, search for "terminal" and you should be presented with the app you just installed at the top of the list. RIGHT click it and a menu will pop up, with the option to "Run as administrator" which you need to click. You'll get a popup from User Account Control asking if you want to allow the app to make changes to your system. Click yes. You'll then get a new terminal window which will open the default prompt. Note that if you are running as administrator, the top left corner will have a shield icon indicating that.
If you don't run the terminal as an admin, many of the installation commands to follow will fail or have weird errors.
Get a CLI package manager
Many of the things we're going to need can be installed using a Command Line package manager, and if your system is updated it probably already has Winget installed. You can check this by opening your new Windows Terminal that you installed, waiting for a prompt to pop up, and then running winget -v. If winget is installed, it will print the installed version number and you are good to go.
I like Chocolatey though, and it's actually a bit easier to use in this guide. You can find it here with installation instructions. You can access the generic Windows PowerShell to install it by searching for "Powershell" using the windows search tool, or locating "Windows PowerShell" in the start menu.
For the rest of this guide I'll give you commands for both package managers where applicable.
Edit - Scoop has proven to be a good option as well and many people are also using it.
Get a better shell
The terminal is the UI for using the command line, and the Shell is the program that interacts with system services and other programs to actually do anything. The shell is what gives you the prompt allowing you to input commands. Windows ships with a native shell called Command Prompt, as well as another shell called Windows Powershell, and they are both very basic with very limited features. They exist as an entry point to the CLI for various system tools, not for use in things like software development. Both of these should render the basic Neovim interface, but neither of these will work correctly for Neovim once you start adding any Neovim configuration.
We need to install something better. If you are on Windows, the cross platform version of Powershell is pretty good, so we'll use it. In your terminal, run the following command: winget install microsoft.powershell or choco install powershell-core You may be asked to hit "Y" a few times during the install, this is fine. Once the installation is complete, close your terminal app and reopen it. Then, along the top bar locate the down arrow to the right of your open tab and click it.

You'll be presented with a window that looks roughly like this.

You won't have all of the entries I have, and those that you do have won't be in the same order, but that's fine. What you are looking for is the entry I have for just "PowerShell" which I underlined in red - NOT the "Windows PowerShell" version. If you see it, you are good to go. If not, back up and try the installation command again and you might also need to restart the computer.
If you have git installed and you opted in to Git Bash, you can also use Git Bash for this process. You'll have to adjust the steps below to use Git Bash instead.
On the same dropdown menu from the last step, click "Settings" and you'll be presented with a UI to adjust how the terminal app works. Take note of the menu button on the top left of the window you are in:
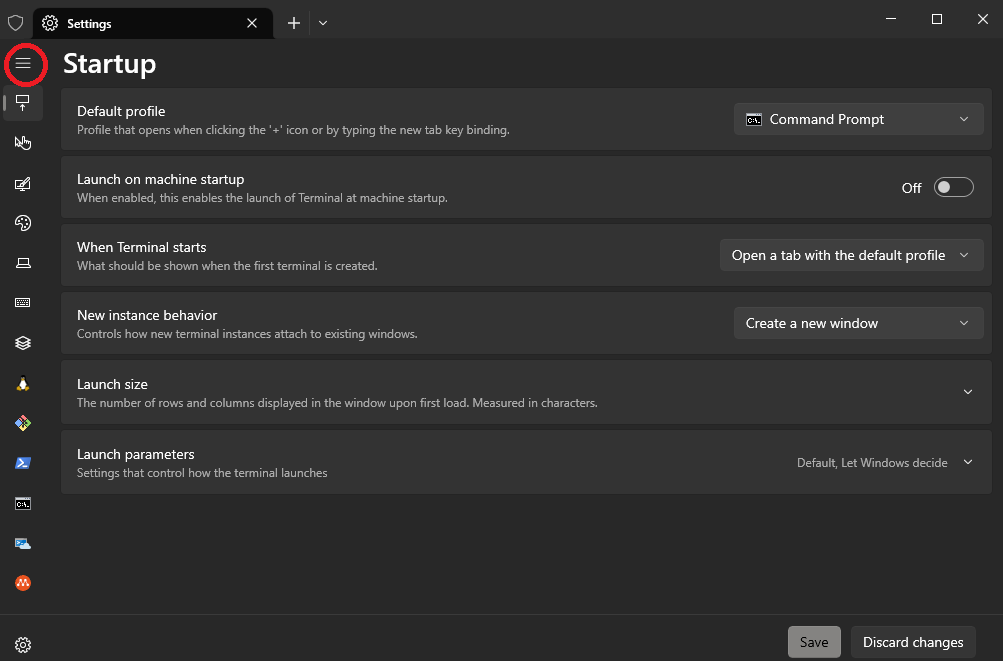
Clicking it will expand and minimize the side menu. Select the "Startup" option, and the top section will be "Default Profile". In that section on the right is a drop-down menu, click it and select your new "PowerShell" entry.

Next, go to the "Defaults" section on the left side menu.

Under the "Additional Settings" header at the bottom click on the "Appearance" section.

Then, under the "Text" header find the "Font Face" option. On the right is a dropdown menu, and underneath is a checkbox to "show all fonts" that needs to be checked.

Then in the dropdown menu find above the checkbox find "CaskaydiaCove NF" and select it.

Finally, at the bottom right of the terminal UI will be a save button. Hit it to save your new settings, and your terminal should now be ready to use for Neovim.

Installing Neovim
Close your terminal and then reopen it with Administrator privileges like we did a few sections ago. It should now automatically open in PowerShell. Now we can install Neovim, which should be very straightforward with the package manager. Just run: winget install neovim or choco install neovim. You may have to hit "Y" once or twice, but the package manager should install it and confirm when finished. Also you may get a message that one or more of the packages required a reboot. If so, you'll need to restart the computer.
Now you need to close the terminal app again and reopen it and then type in nvim --version. If you don't get an error and instead get the version information, neovim is installed. You can now run the command nvim to get the base experience!
You also need to check that the Neovim version is up to date. As of the date of this article, the version required for the full feature set is at least version 0.8.0. When I run the version check I get this in the terminal, with Neovim installed from Chocolatey.

If your package manager isn't giving you a new enough version, you can also install using the instructions from the Github releases page.
At this point you can start editing files, as well as access the built-in tutor and user manual. If you haven't already, work through the tutor and get used to the motions before moving on to the next section.
Install Git
You may already have Git on your system. It's easy enough to check, you can run git --version and if you get a version number instead of an error, you have git. If not, you'll need it for the next step. It's easy to install though. Once again from a terminal with Administrator permissions, run choco install git or winget install git.git, then hit Y when you need to and restart your terminal when you are done. (you might see a pattern forming with the package managers, they are really easy to use. I encourage you to research them more if you haven't already)
Adding your first configuration
I'll assume for this section that you want to start customizing, with things like the Telescope and Treesitter plugins. To that end, I'll show you how to install a couple of system dependencies while we go and then we'll install Kickstart.nvim to get an idea of how a configuration works in Windows.
To start out, the Telescope plugin uses RipGrep for its live-grep builtin. RipGrep needs to be installed separately, but the package managers have us covered. Open an admin terminal again and then run the install command: winget install 'ripgrep msvc' or choco install ripgrep. Again, hit "Y" as needed. You'll have to restart the terminal again afterward.
Next we need to talk about Runtime Paths. When Neovim starts up, it searches a certain group of directories in a certain order to look for relevant files to load. If you open Neovim and then run the command :help runtimepath you will get the help docs discussing this. However most of the documentation you find will be written assuming a Unix based system like Linux or MacOS, with a certain file structure convention to match. Windows is a bit different, but there are just a few things you need to know that will help you make sense of this. 95% of the issues with directory structures can be solved with this information.
If the Linux docs say ~/.config/nvim as a the root of a directory, the default Windows directory is ~\AppData\Local\nvim
If the Linux docs say ~/.local/share/nvim as the root of a directory, the Windows default directory is ~\AppData\Local\nvim-data
The only time the windows directories will be different is if something is setting an environment variable for $XDG_CONFIG_HOME and / or $XDG_CONFIG_DATA, which is very rare on windows. If you run into this, google how to check the value of those two environment variables and you'll see where your config directories are.
You can find the locations of all of the default directories Neovim will use by opening Neovim and running :h xdg
Next, we can make a directory for our config to live and a starter config file. First, make sure you are in your home directory by running cd ~. Then do as follows:
Change directories into your Local config: cd AppData\Local
Create a new directory for your neovim config: mkdir nvim
Move into the Neovim directory: cd nvim
Make the first config file: New-Item init.lua
A quick aside on Powershell commands: The actual commands Powershell uses are very descriptive, but also very verbose. Many (but not all) common linux commands are aliases in Powershell as a convenience feature, meaning the commands above should work out of the box. For example, cd is an alias for the Set-Location Powershell command. If you get something wrong while following the steps, rm is NOT an alias and you'll need to use the Powershell command Remove-Item instead.
You can also get help in the terminal on pretty much any built-in command by running Get-Help <Some-Command>, so for the rm example you can look at Get-Help Remove-Item
Now open the init file you just created: nvim init.lua and you'll be presented with a blank Neovim buffer.
Next we'll get the Kickstarter config from this repo. If you open the link, above the code window on the right is a Raw button.

Click that to open a page that has just the text of the file, then hit ctrl-a to select it all and ctrl-c to copy it.
Back in your open neovim window, hit i for insert mode, then ctrl-v to paste all of that config in. The terminal will give you a popup asking if you want to paste in all the lines, hit the "Paste Anyway" button. Then hit escape to switch back to normal mode, and hit gg to go to the top of the file. You want to make sure the first line in neovim and the first line on the webpage you just copied are the same. The top of the file should look like this:

Assuming you have the same thing at the top of each, run :wq in neovim to save and quit, then run nvim init.lua again and hold in tight, a bunch of things are about to happen, starting with a blank screen and ending with an error: Either this:

or this:

Getting around this error is easy to do, but I wanted to make sure it appeared. This happens because the either the fzf-native plugin or the Treesitter plugin that the config is trying to install depends on the system having a C compiler present. You only need one of the entries mentioned in the second error message to get things working though. CC and GCC are both somewhat tricky on windows. Clang is next but it's a bit hidden inside LLVM. Out of all of them, I found Zig to be the easiest one to work with.
You can hit q if you see the first error, or just hit the enter key if you hit the second error, until you get this screen:
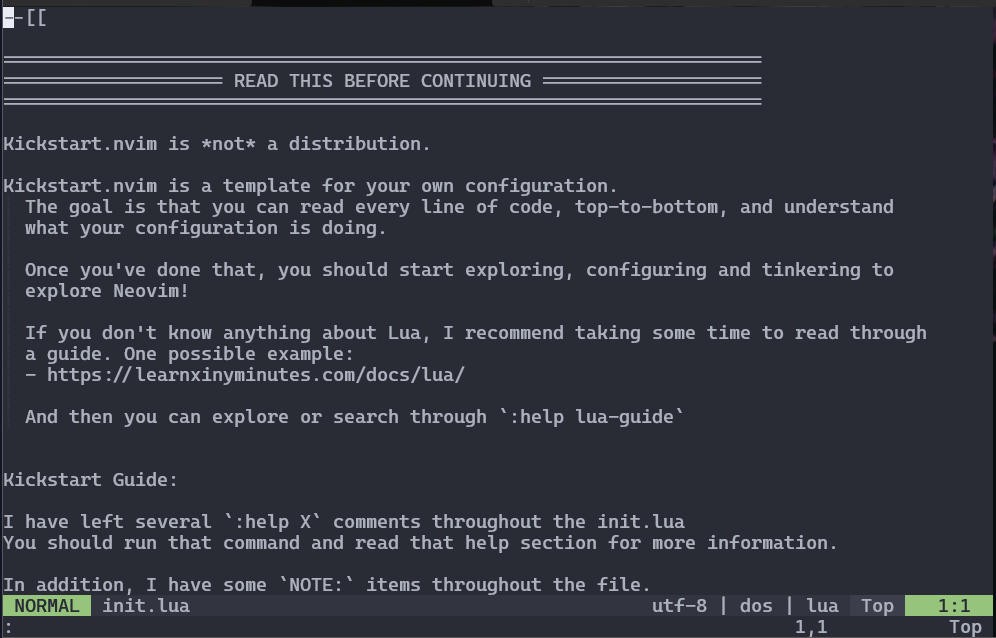
Notice the styling and colors look a lot better now, but we still need to fix those errors. Run :q to quit neovim, then close the terminal and reopen it with Admin permissions again. To install Zig, you either need to do a manual install per the website, which includes instructions on how to add it to your PATH so other programs can find it, or you can use Chocolatey: choco install zig - note that I didn't include the command to install from Winget - as of the time of writing this, Winget doesn't have zig available.
Installing this package might take a minute, and at the beginning it might look like nothing is happening. Let it finish, then close the terminal and reopen it again. Navigate back to the ~\AppData\Local\nvim directory and run nvim init.lua one more time. You might see a generic error message that looks something like this and you can hit enter past it. (It's for a customization stub that Kickstart added but hasn't implemented yet. You can comment out or delete the call at line 189 of the your init.lua file to make it go away. There are comments above it discussing what it's for.)

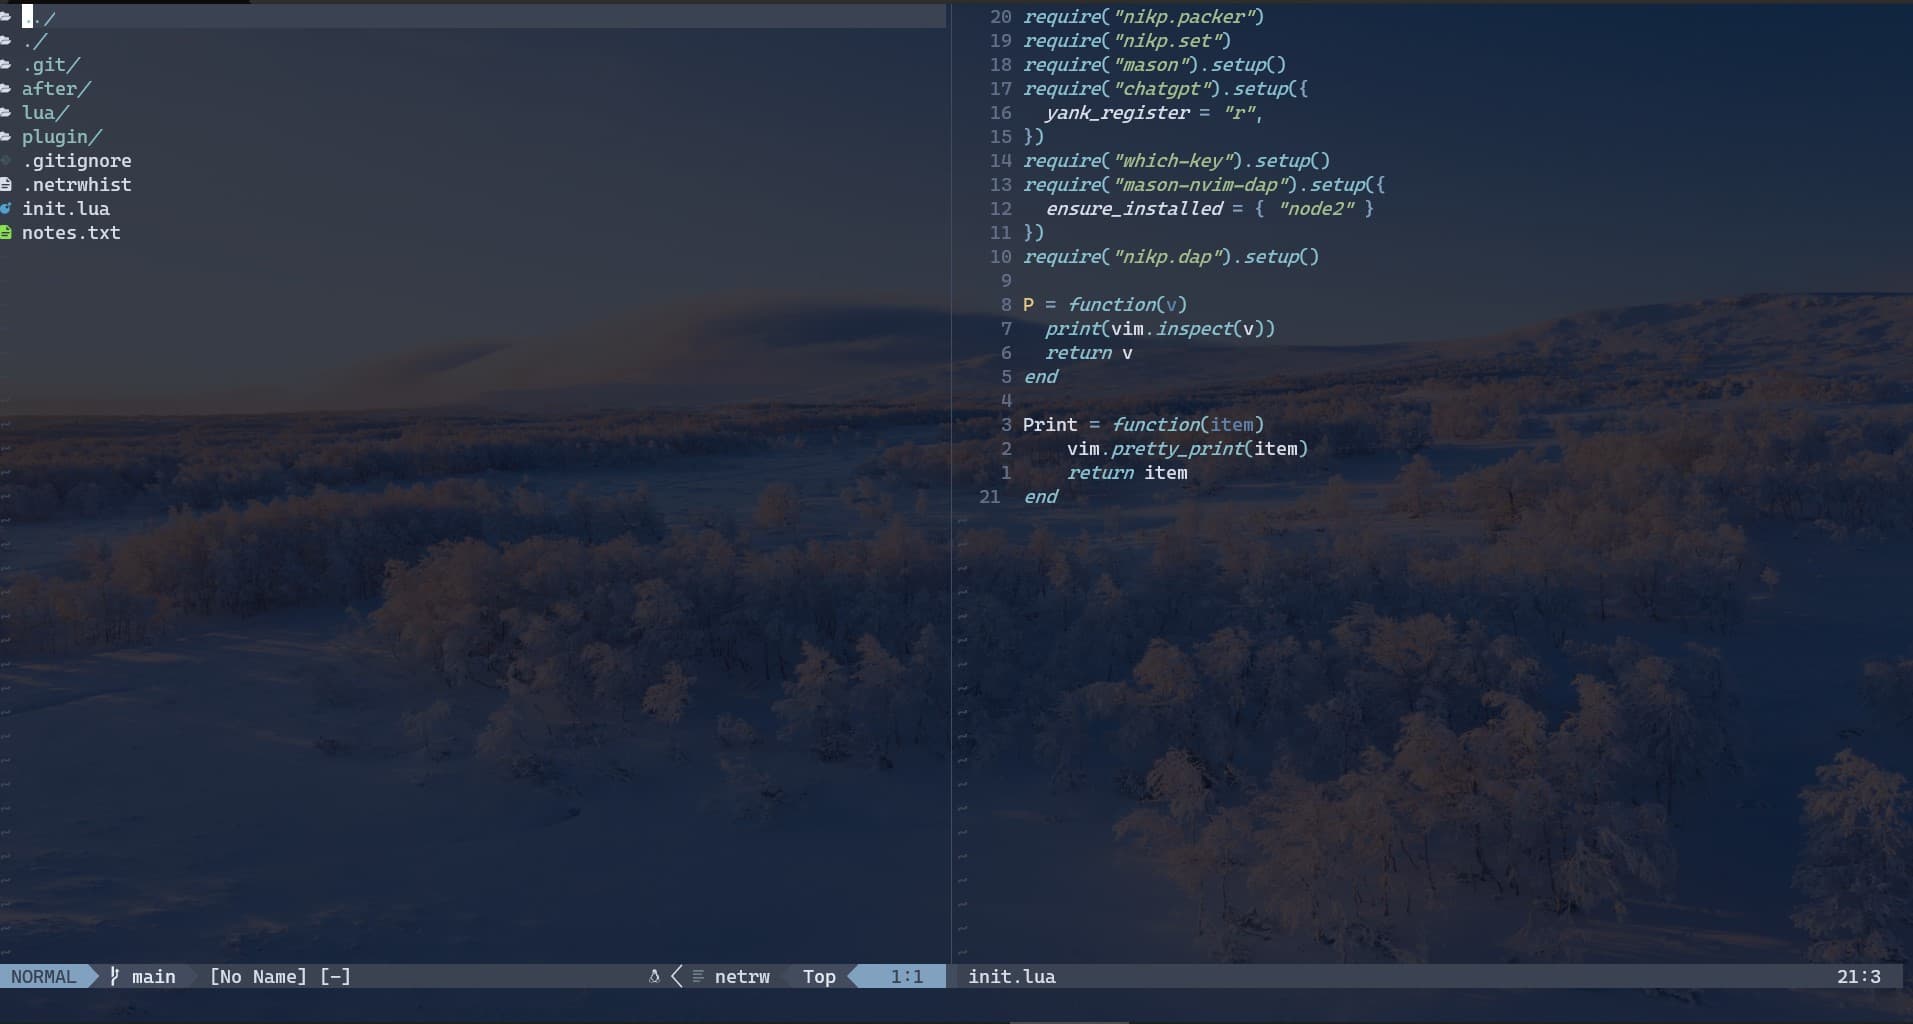
Then you'll be presented with a working config and you'll see a message in the bottom of the Neovim window that treesitter is installing. It's using the Zig compiler to build what it needs for the languages that your new init.lua sets up as defaults.
A quick note if you have a slow experience
While I was testing all of this out I found that Neovim was running very slow on windows. A bit of research on my part indicated that it might have something to do with the antivirus, Neovim, and the file system all interacting. Going back into the config and finding these lines near the top:
vim.g.mapleader = ' '
vim.g.maplocalleader = ' '
And then adding this line:
vim.g.nofsync = true
solved the issue for me.
A quick mention of WSL for Windows
If you are planning to do a lot of software development with Neovim, and you have the ability to use the Windows Subsystem for Linux, it's a very good option as well. I mentioned in the beginning that I use it all the time, and besides a couple hiccups with the clipboard it's been great to work with, especially with Neovim. I still use it for the bulk of the dev work I do, despite having Neovim running on Windows as well. I need to clarify that I use WSL2, and I don't reach across from the Windows file system to the WSL file system directly as performance for that kind of thing is terrible with WSL2. But I have full Linux kernel access, I can launch dev servers bound to ports, etc. I recommend you look into using it as well as an alternative.
Installing WSL for most current Windows systems is a simple as opening any shell, and then running the command wsl --install. In fact the MS Docs for installing and configuring WSL are pretty good. If you decide to go this route, you can then install Neovim and the related support programs (ripgrep, a C compiler, etc.) inside the Linux OS. You'll still need a better terminal on Windows (Windows terminal works great) and you'll still need a nerd font, but the actual running of Neovim would be inside WSL2, and in the case of Windows Terminal, the Linux distro you install would become available in the available shells you can pick to use.
Giving further instructions on installing and setting up Neovim on WSL is beyond the scope and intent of this article, but here are a few resources to get you started if you go the WSL direction:
Here is the link for the Neovim installation instructions, including Linux
Here is a guide that includes alternative installation methods
Conclusion
From this point, you can use the Kickstarter config as-is, or start modifying it to suit your needs. Or you can delete it altogether and start over. At this point, Neovim is yours to shape and play with. I'd recommend reading through the kickstarter config carefully though including all the code and comments, because it contains a lot of good information and common patterns used in Lua development.
Also if you want to start working on your own config, I strongly recommend you make ~\AppData\Local\nvim a git repository. That way you can commit a working config, revert changes when experiments don't work out, branch your config to try whole new configs altogether, and generally have more freedom and less risk of losing a working config. You can also push the repo up to Github and make it portable between systems.
Conversely, if you already have a working config on another OS, you can use Git to clone it into the nvim directory on windows and maintain one editing experience in two systems.
If you made it this far, I hope you found it helpful and I hope you had fun! If you get stuck with something, remember the links I provided for help above, or post a comment and I'll try to help out.
Thanks for reading!